After a tiring day of work, you might want to unwind in the bathtub, but over time, you may notice that the tub becomes increasingly dirty. This is likely due to a lack of regular cleaning, leading to the buildup of soap scum, stains, or grime. To enjoy a more pleasant soaking experience, it's essential to regularly maintain and clean your bathtub. If hard stains have already formed, cleaning them is just as easy—just follow this guide! Let's get started!
How Often Should I Clean My Bathtub
This is perhaps the most pressing question for most bathtub owners because while they want to enjoy the immersive soaking experience, they don't want to spend too much time maintaining it. Not to worry, it won't consume too much of your precious time.
The frequency of bathtub cleaning depends on its usage. For regular cleaning, it's recommended to clean it every two weeks, which should take you around 10-15 minutes each time. This mainly involves removing accumulated grime and soap scum. For a deeper clean, Giving Tree Home suggests doing it every six months. If you notice mold or slow drainage, it's best to clean it promptly.
By cleaning the bathtub regularly, it will always stay clean. Now, let's discuss how to restore a bathtub that has accumulated dirt and make it look brand new again!
Routine Bathtub Cleaning Procedure
- Preparation:
Before cleaning the bathtub, remove any accessories such as toiletries, toys, or bottles from the bathtub. Make sure to clean these items before placing them back after cleaning the bathtub to remove any soap residue or grime.
- Clearing the Drain:
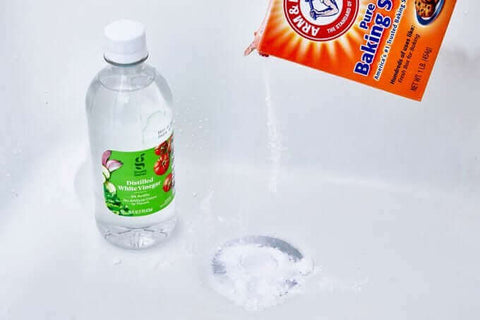
Even if there are no immediate drainage issues, it's advisable to periodically clean the drain pipes. You can use chemical drain cleaners, baking soda, or vinegar. For regular cleaning, baking soda is environmentally friendly and safe.
Pour half a cup of baking soda down the drain, followed by an equal amount of white vinegar. After a few minutes, flush with hot water.

- Wait for Reaction:
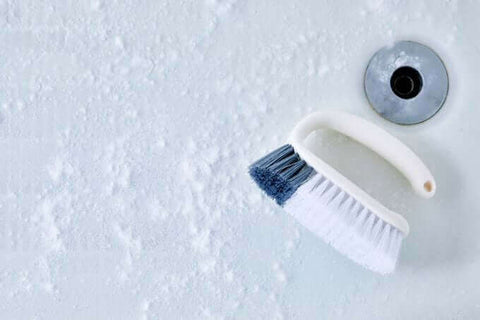
Close the drain plug and pour a generous amount of baking soda to cover the walls and bottom of the bathtub. You can also apply toothpaste or white vinegar in moderation. Wait for thirty minutes to an hour, then scrub the corners and other hard-to-reach areas of the bathtub with an old toothbrush or small scrub brush. Thorough coverage and adequate reaction are crucial during this process, making scrubbing easier. You can complete other tasks during the waiting period.

- Scrubbing Stains:
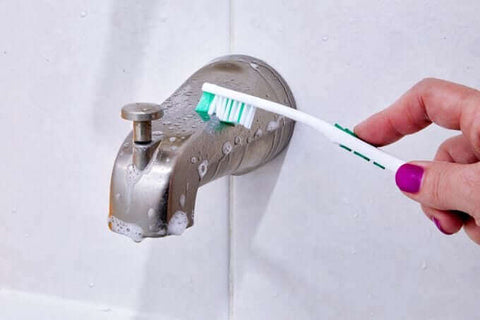
Mix one gallon of hot water with 3 tablespoons of liquid detergent in a bucket. Dip a cleaning brush into the solution and scrub the interior of the bathtub from the top down, allowing the cleaning solution to drip to the bottom of the bathtub. An old toothbrush can be used for edges, around fixtures, faucets, and other hard-to-reach areas.
During cleaning, keep the following points in mind:
- Wear gloves to prevent direct contact with chemical cleaners.
- Use a nylon cleaning brush instead of abrasive brushes.
- Gently wipe when dealing with grout.
- Cleaning the Bathtub Faucet:
Different bathtub faucets require different treatments. Common materials include polished chrome, nickel, stainless steel, oil-rubbed bronze, or brass. Brass is the most reliable and can be brushed directly, while others may be threatened by scratches. Generally, hot soapy water can solve the problem. To reach even the most inaccessible cracks and places, use dental floss to remove sticky residue from the nozzle and the connection between the nozzle and the bathroom wall.

- Cleaning Around the Bathtub:
The walls and tiles around the bathtub are also part of the entire cleaning process. Use a cleaner, preferably in conjunction with the interior of the bathtub, but it can also be used separately. After a few minutes, scrub the walls from top to bottom with a nylon brush. If you cannot reach the walls because they are too high from the floor, you may need the help of a ladder. Just be careful not to stand on slippery surfaces in the cleaning area.
- Rinsing the Bathtub:
Once you are satisfied with scrubbing and cleaning the bathtub, the next step is to rinse everything. Thoroughly rinse the bathtub with a bucket of clean water until all dirty water is drained. If you are equipped with freestanding bathtub faucets, this process will be easier. After completing all of these steps, dry the bathtub!
Cleaning Methods for Bathtubs of Different Materials
In fact, there isn't a one-size-fits-all approach to cleaning bathtubs; rather, it's about finding the most suitable method based on individual circumstances. A practical tip is to consider the bathtub material when determining the most effective technique.
Fiberglass and Acrylic Bathtubs:
Fiberglass and acrylic tubs are common in many homes and apartments due to their durability and affordability. These bathtubs, made of plastic materials, are relatively flexible compared to other materials. When cleaning them, avoid abrasive products and instead opt for soft nylon brushes along with baking soda and white distilled vinegar. For tougher stains, try soaking the tub in equal parts white vinegar and hot water for 10 to 15 minutes to loosen grime and dirt buildup. After draining the tub, apply a paste of baking soda and scrub gently with a soft brush, using a smaller brush like a toothbrush for corners and around the faucet.
Further Reading: Best Way to Clean an Acrylic Bathtub
Enamel and Porcelain Bathtubs:
Enamel and porcelain tubs, commonly found in older homes, have a smooth, shiny appearance. You can identify them by their metallic sound or by testing with a magnet (enamel tubs will not attract magnets). These materials are sensitive to bleach, so it's best to clean them with a mixture of dish soap and hot water applied using a gentle rag to remove soap scum and surface buildup. For stubborn stains, a solution of equal parts ammonia and baking soda diluted in warm water can be used for a deep clean. Thoroughly rinse the bathtub afterward.
Further Reading: How to Clean a Porcelain Bathtub
Natural Stone Bathtubs:
For a natural stone, the recommended cleaning solution is the one that works well with stone kitchen countertops. A general rule is to avoid any aggressive chemicals that can corrode the stone and leave stains and discoloration. Instead, use a mixture of equal parts dish soap and warm water with a nonabrasive sponge to get rid of the dirt. In case a deep clean is needed, use a mixture of baking soda and water, apply on the stains and leave it for a few hours then rinse and dry.
Further Reading: How to Clean Solid Surface Bathtubs
Cleaning Methods for Different Bathtub Stains
Bathtub stains are caused by different reasons, and the color of the stain can give a rough indication of the cause:
Black
This might be the most disgusting stain, often caused by mold. This fungus thrives in damp, poorly ventilated environments, making your bathroom an ideal location for them. To prevent black mold from appearing on your bathtub, it's important to dry the surface promptly after use and prevent prolonged standing water.
Thoroughly cleaning black mold stains on the bathtub requires using a cleaner containing bleach or germicidal ingredients. Apply the cleaner to the entire surface of the bathtub, not just the black stained areas. These cleaners have strong corrosive properties, so they shouldn't be left on the bathtub surface for too long to avoid damage. After the cleaner has been left for a few minutes, use a brush, sponge, or cleaning cloth to thoroughly scrub the bathtub surface. Finally, rinse the bathtub thoroughly with hot water, then dry the surface with a towel or cleaning cloth to ensure it is completely dry. Check the corners, crevices, and uneven areas of the bathtub, as these are key areas where mold thrives, and ensure thorough cleaning to prevent mold from regrowing.
Yellow
Yellow stains are a common issue with all white bathtubs, and touching the accumulated yellow stains can give a rough feeling. The causes of these stains are varied, ranging from the accumulation of minerals like calcium, iron, or manganese in hard water to the buildup of other grime or soap scum. Using a hard-bristled brush may damage the enamel surface of the bathtub, and prolonged use of highly corrosive cleaners can also cause the bathtub to yellow.
Cleaning stubborn stains of this nature is not difficult; simply follow the routine bathtub cleaning procedure mentioned above. However, if the bathtub has yellowed due to non-accumulative issues, restoring it to its original state may be more challenging. In such cases, you may need to reglaze the bathtub to achieve renovation.
Further Reading: How to Remove Yellow Stains from a Bathtub
Red
Red stains in bathtubs are typically formed by the high concentration of iron oxide in water, often resulting from rusting of old pipes and fixtures. Rusting of pipes and fixtures is primarily a result of various factors, including chemical reactions of metal materials, water quality, and environmental factors. To reduce this phenomenon, it is recommended to use corrosion-resistant materials and install water treatment devices to reduce the corrosion of metal materials by harmful substances in water. If the iron content in the household water is high, consider installing filters or other water treatment equipment to reduce the iron content.
The correct cleaning of red stains in the bathtub depends on the condition of the pipes, as it may require the use of corrosive cleaners such as sodium hydroxide (NaOH) or potassium hydroxide (KOH), strong alkaline cleaners, natural cleaners such as lemon juice or white vinegar, or commercial rust cleaners containing chemical substances. For newer bathtubs, it is advisable to use lemon juice or white vinegar as they are gentler to avoid damage to the pipes.
Ending
As long as you choose the right bathtub cleaning method, even stubborn stains can be easily removed. The key is to select the appropriate cleaner based on the bathtub material and the type of stain. If you have purchased a bathtub from Giving Tree Home, you can consult our customer service to learn how to clean and maintain it. With regular use and maintenance, bathtubs sold by Giving Tree Home can last for at least 10 years!


